This project combines two simpler projects – Button Press and LED Status Lights to create a State Machine. Each time you press the button, it will change the color of the LED. You’d use functionality to set the status of a device, perhaps to enable it and then to set different modes.
// Sketch for HW-479
// Components: https://www.iotprojectkit.com/components/hw-479-rgb-led-module/
// https://www.iotprojectkit.com/hw-483-push-button-module/
// Tutorial: https://www.iotprojectkit.com/state-machine/
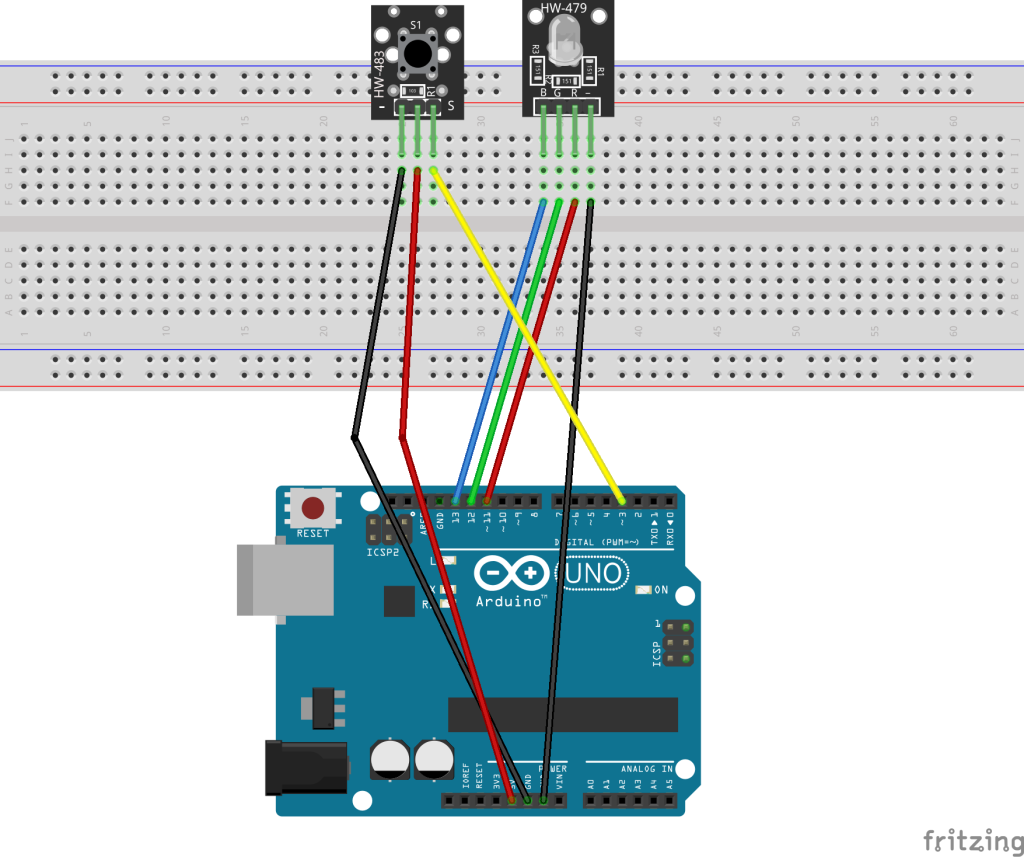
// Change to the pin number that the Button module "S" pin is connected to
#define BUTTON_PIN 3
// Change to the pins you have connected to the HW-479 RGB LED Module
#define RED_PIN 11
#define GREEN_PIN 12
#define BLUE_PIN 13
enum States {
OFF,
RED,
GREEN,
BLUE
};
// Set the initial (i.e., starting) state
States state = States::OFF;
void all_off() {
digitalWrite(RED_PIN, LOW);
digitalWrite(GREEN_PIN, LOW);
digitalWrite(BLUE_PIN, LOW);
}
void setup() {
// The following actions should always happen,
// irrespective of the state
pinMode(RED_PIN, OUTPUT);
pinMode(BLUE_PIN, OUTPUT);
pinMode(GREEN_PIN, OUTPUT);
digitalWrite(RED_PIN, LOW);
digitalWrite(GREEN_PIN, LOW);
digitalWrite(BLUE_PIN, LOW);
Serial.begin(9600);
}
void loop() {
if (!digitalRead(BUTTON_PIN)) { // is the switch closed?
// switch closed with pull-up resistor
delay(50); // switch debounce delay
while (!digitalRead(BUTTON_PIN)); // wait for switch to open
if (state == States::RED) state = States::GREEN;
else if (state == States::GREEN) state = States::BLUE;
else if (state == States::OFF) state = States::RED;
else state = States::OFF;
// State-aware actions
switch(state) {
case States::OFF:
all_off();
break;
case States::RED:
all_off();
digitalWrite(RED_PIN, HIGH);
break;
case States::GREEN:
all_off();
digitalWrite(GREEN_PIN, HIGH);
break;
case States::BLUE:
all_off();
digitalWrite(BLUE_PIN, HIGH);
break;
}
}
}